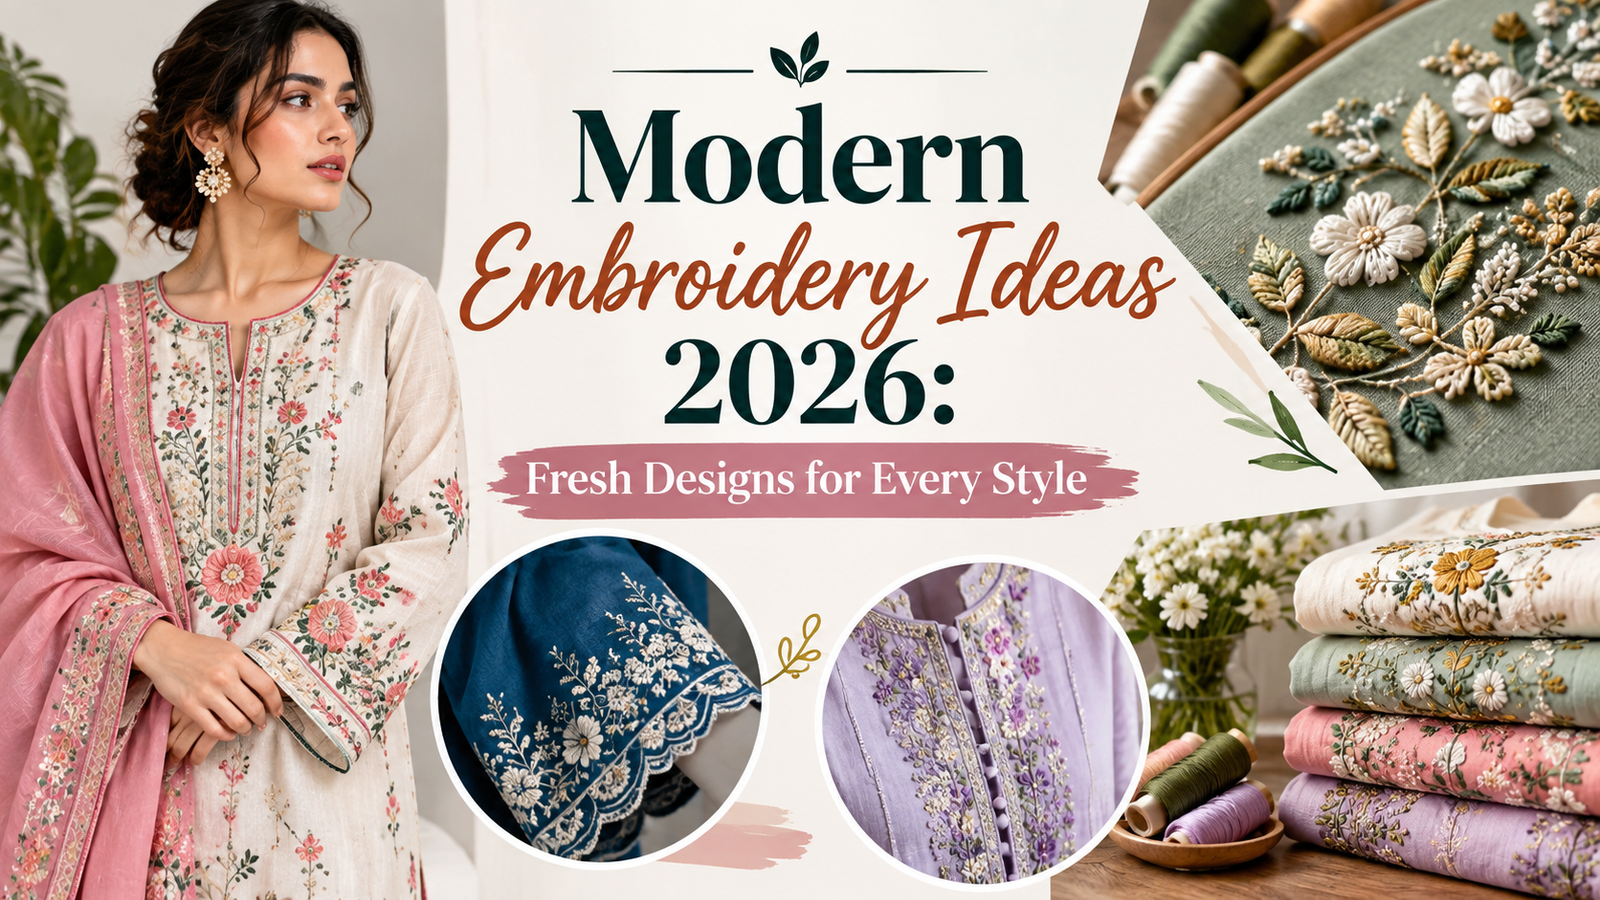
Modern Embroidery Ideas 2026: Fresh Designs for Every Style
There is one habit that quietly ruins more projects than clumsy stitching ever has, and almost every stitcher hunting for modern embroidery ideas 2026 has it. The motif gets chosen first. A folder fills with saved images — a fern, a wave, a tiny sun, a monogram in a typeface nobody can name — and then the search begins for something to put them on. The thread doesn’t sit well against the fabric. The design lands too close to a seam. The hoop goes into a drawer with three stitches in it.
Makers who finish things work in the opposite direction. Garment first. Palette second. Technique third. The motif turns up last, and by then most of the decisions have already been made for it.
What follows is one project built that way, start to finish.
Quick Answer: Modern embroidery right now leans toward texture, restraint and repair — raised and padded stitching, tone-on-tone lettering, a single metallic accent, simplified traditional motifs, and decorative mending on clothes you already own. The reliable method is to choose the garment and colour range first, then match one technique to it, and select the motif last.
The Illustrative Project: A Ten-Piece Refresh
A composite scenario built to show the sequence — not a real reported case.
The stitcher here is the invented, assembled from the way experienced makers tend to a work rather than from any one person. Picture someone about two years in: comfortable with a handful of stitches, a modest thread stash, an ordinary sewing machine, no embroidery machine, no dedicated the craft room. A kitchen table and good light.
Her plan covered roughly nine months and ten finished objects — seven to wear, three for the house. Each one was chosen to test a different current direction rather than to repeat what she already knew. She set one rule and kept to it: nothing new gets bought until something existing gets stitched.
Every phase below closes with the part that transfers to your own work, whatever your taste and wherever you are stitching.
Phase One: The Palette Came Before The Pattern
A single colour decision removed most of the mistakes that would have come later.
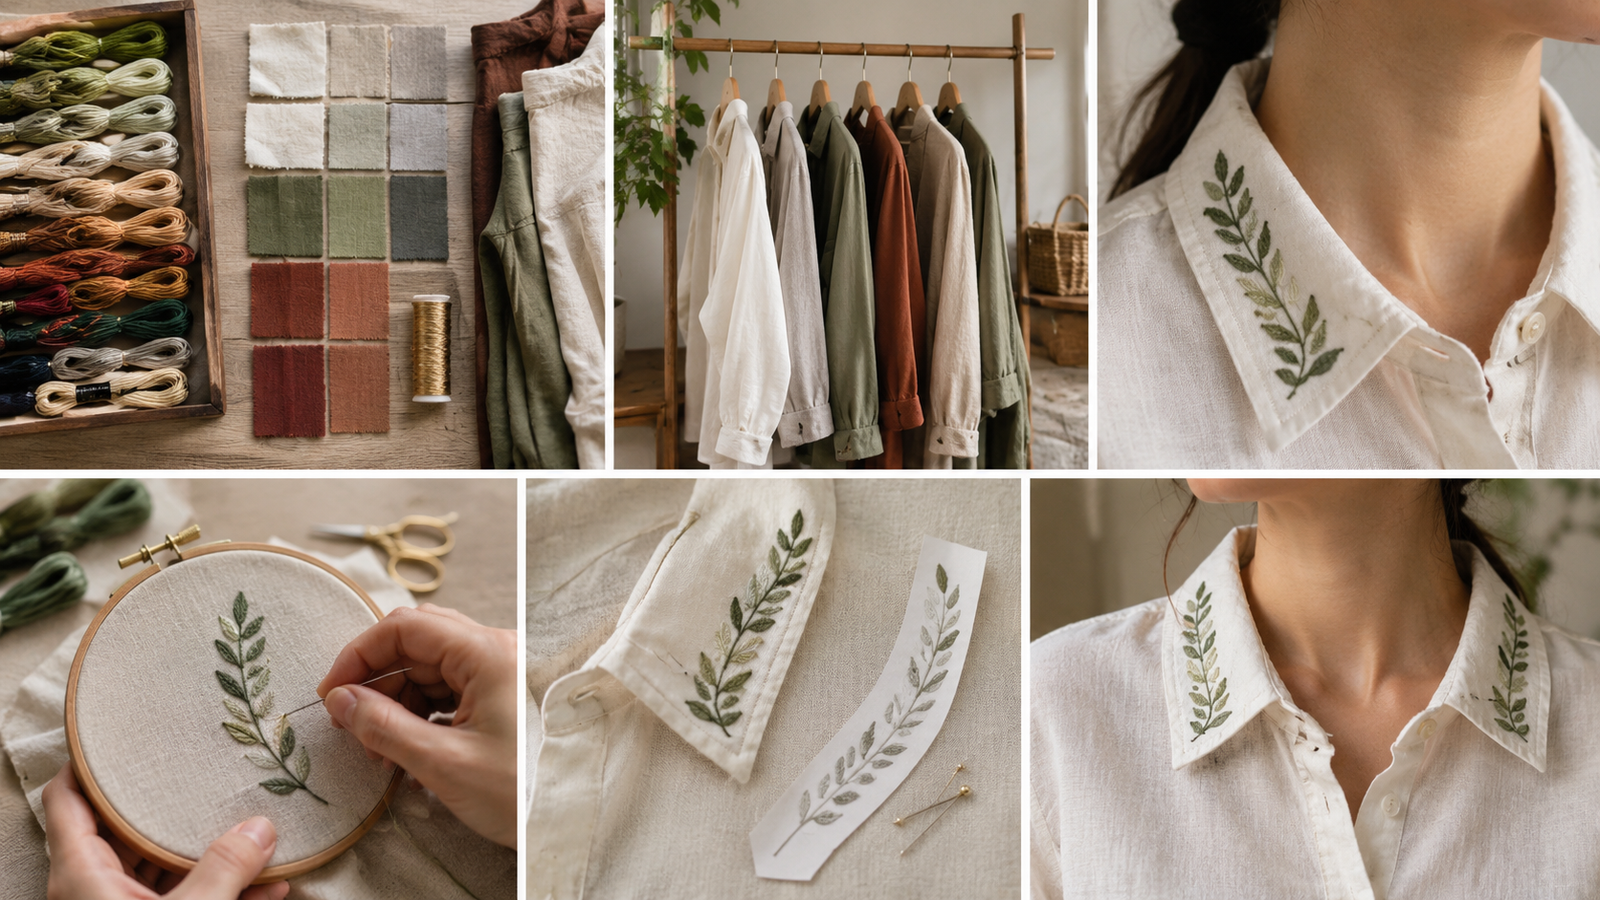
She began by emptying her thread box onto the table, which was a mildly humbling exercise. Forty-odd colours, most bought for one project, few of them speaking to each other. Alongside it she laid out the clothes she wore most weeks. The overlap between the two piles was almost nothing.
So she built a working palette of the nine: three soft off-whites and greys, three muted plant tones, two warm earths somewhere between rust and a clay, and one metallic held in the reserve. Everything else went into a separate box marked for repairs and experiments only.
The wider mood in design this year has helped this kind of restraint along. Soft, chalky neutrals have become the default background of almost everything — clothing, interiors, packaging — and neutrals are unusually generous to thread. A quiet ground lets a single accent colour do real work. Loud fabric fights the stitching; calm fabric hands it the stage.
Nine colours. Not forty.
The lesson: a fixed palette is the cheapest quality upgrade available to any stitcher. Work pulled from one restricted range starts to look like a body of work. Work stitched in whatever colour was nearest to hand always looks like practice, no matter how neat the stitches are.
Phase Two: Minimalist Embroidery Designs On A Shirt Collar
The smallest piece in the project taught the most about placement.
The first finished object was a single stem of leaves running along the inner edge of a shirt collar, worked in three shades of one green. Two quiet evenings.
Restraint of this kind is the doing well for a reason that has little to do with fashion cycles. A small design is fast enough to finish, cheap enough to risk, and versatile enough to sit on a shirt, a napkin or a bag without looking out of a place. It also survives repeated washing better than a large dense panel, and which matters if the piece is the meant to be worn rather than admired.
Her first attempt got the drawing right and the scale wrong. Sketched at nine centimetres, the stem looked marooned on the collar, neither decoration nor detail. Redrawn at five and shifted a centimetre away from the edge, it suddenly read as something the shirt had always had.
The lesson: with minimalist embroidery designs, placement carries more weight than the drawing does. Cut your motif out of paper at full size, pin it to the garment, and wear it around the house for an hour before you thread a needle. Your eye will tell you within minutes what an hour of sketching would not. [https://emanembroidery.store/best-embroidery-designs-for-2026-elegant-ideas-for-modern-fashion/]
Phase Three: Texture, Where 3D Puff Embroidery Changed The Rules
Raised stitching gave a plain sweatshirt the presence of something bought rather than made.
Height is the loudest theme in embroidery at the moment, and it is the one that translates worst into photographs and best into real life. A raised design catches light along one edge and throws a small shadow along the other. Flat stitching, however skilful, does neither.
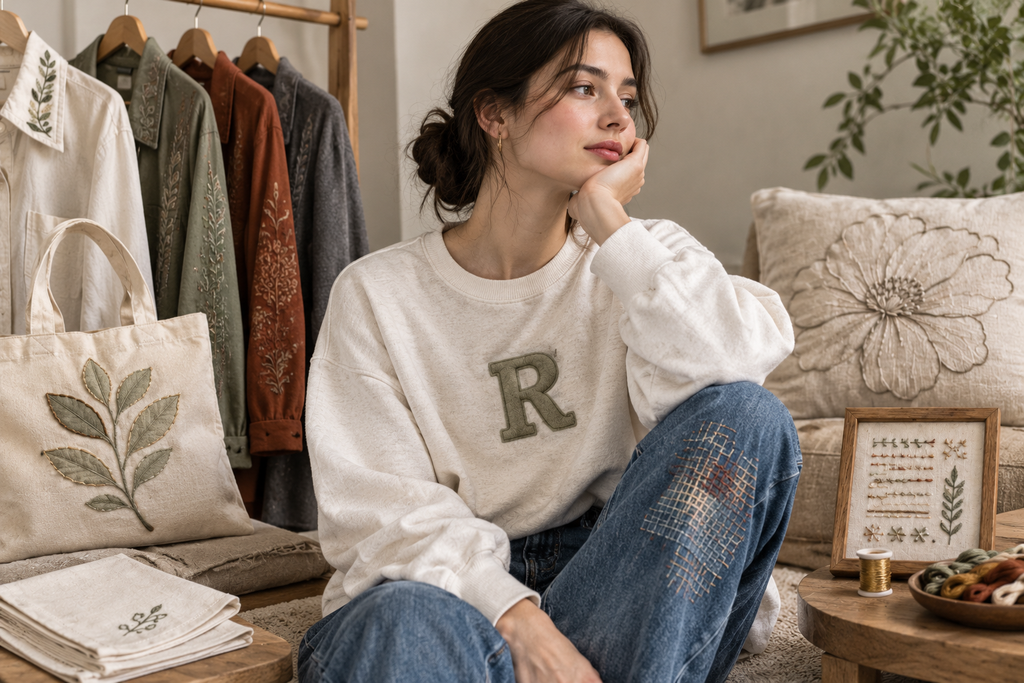
True 3D puff embroidery is a machine method built over a foam layer that the needle cuts through, and she had no machine. So she borrowed the effect by hand. Three layers of felt were cut in the shape of a two-letter monogram, stacked smallest to largest, tacked down, and covered with a dense satin stitch worked across the padding. The edge stood proud of the sweatshirt by a couple of millimetres. That was enough.
It took four hours where a machine would have taken four minutes, and it looked better than the machine version would have, because the slight irregularity of hand satin stitch reads as craft rather than output.
A tote bag handled the other half of this phase. A linen shape was laid onto the canvas, secured, and framed with a heavy outline stitch — appliqué, in other words, which achieves depth by adding fabric instead of adding thread. It is faster than filling the same area with stitching and considerably kinder to the hands.
The lesson: when a design feels flat, add height before you add colours. Padding, felt underlay, appliqué and thicker thread all lift a piece off the surface. A raised design in two colours will almost always beat a flat one in six.
Phase Four: Visible Mending Ideas On The Jeans She Nearly Threw Out
The most-worn piece of the whole project started as a hole.
Two pairs of jeans went into this phase — one with a knee that had finally given way, one with pockets worn to gauze. Both were backed from the inside with a patch of scrap denim, then covered on the outside with rows of straight running stitch in the rust and clay tones from the palette. Rows first in one direction, then a second set crossing them at the weakest point.
This is the gentlest possible entry into hand embroidery, and it is worth saying plainly why. There is only one stitch to learn. The fabric is thick enough to be forgiving. Any unevenness in the rows reads as the character of a repair rather than a mistake, because that is precisely what people expect a repair to look like. And the object was already halfway to the bin, so there is nothing to lose.
Her first mend was uneven. The rows drifted. One patch sits very slightly crooked, which she noticed immediately and nobody else has ever mentioned. Those jeans have now outlasted two pairs bought new in the same period.
Mending also solves the problem of what to stitch, which is the problem that stalls most beginners. The hole tells you where the design goes and roughly how big it needs to be. All you supply is the colour.
The lesson: start your visible mending ideas on the garment you would otherwise throw away, not on the one you love. Running stitch alone will carry you through the first several repairs, and by the fifth your rows will be even without you thinking about it. [https://emanembroidery.store/best-embroidery-designs-for-2026-elegant-ideas-for-modern-fashion/]
Phase Five: Traditional Motifs, Redrawn Rather Than Reproduced
Heritage designs finally worked once she stopped copying them exactly.
Every stitching culture in the world has produced border work — repeating geometry running along an edge, built to be worked quickly and read from a distance. She took that idea rather than any specific pattern: three simple shapes, repeated along the front edge of a wool jacket in chain stitch, all in one grey a shade darker than the wool itself.
Faithful reproduction rarely works on modern clothing, and the reason is colour more than form. Traditional palettes were chosen for traditional garments, and lifted wholesale onto a contemporary jacket they read as costume. Take the same structure — the repeat, the rhythm, the family of stitches — and rebuild it in your own restricted palette, and it reads as design.
Tone-on-tone is the version of this that has aged best. Thread one or two shades from the fabric gives you pattern that appears and disappears depending on the light, which is a far more interesting effect on a garment you wear daily than something that shouts from across a room.
The lesson: with heritage embroidery designs 2026 audiences respond to, borrow the structure and change the colour. Keep the geometry, drop the palette. And if you are drawing on a tradition that is not your own, take the general principle of border work rather than a specific culturally significant pattern.
Phase Six: What Machine Embroidery Trends 2026 Offered A Hand Stitcher
She still does not own the machine. She changed how she works anyway.
Three ideas crossed over from the machine world, and none of them required equipment.
The first was scale. Machine work has been moving smaller — fine detail placed on a cuff, a hem, a collar point rather than across a chest. Small is harder by hand, but it is also faster, and a two-centimetre motif in exactly the right position beats a twenty-centimetre one in roughly the right position every time.
The second was materials. Metallic threads have become considerably more pleasant to handle than they used to be, and one metallic in a nine-colour palette earns its place: a few stitches of it will lift an otherwise muted design without unbalancing it. Use it as seasoning, not as an ingredient.
The third was mixing methods. Some of the most interesting current work is not embroidery alone but embroidery over something else — stitching added on top of a printed graphic, around a patch, or across a seam of contrasting fabric. She took a plain printed tee and outlined part of the print in a single colour, which took under two hours and produced something neither the print nor the stitching would have managed by itself.
Underneath all three sits a slower shift worth noting: better base materials. Natural fibres, honest weaves and undyed cloth take a needle more sympathetically than cheap synthetics, hold stitch tension without puckering, and last long enough to justify the hours you put into them.
The lesson: you do not need the equipment to borrow the thinking. Scale, materials and method-mixing cost nothing to adopt. The machine changes speed, not judgement.
Phase Seven: The Three Pieces For The Home
Home textiles became the place where every risky idea was tested first.
Three objects closed out the project: a set of linen napkins with small corner monograms, a cushion cover carrying one oversized flower in outline only with no fill at all, and a small framed sampler holding every stitch she had learned that year, worked on scrap.
Home pieces are the right laboratory. There is no fit to get wrong, no drape to fight, no seams to stitch across, no stress points, and nobody inspects the reverse. A cushion front is simply a flat, forgiving canvas that happens to be useful afterwards.
The outline-only flower was the surprise of the whole nine months. It cost about ninety minutes and one colour, and it looks more deliberate than the densely filled version she had originally planned. Negative space is doing a lot of quiet work in current textile design, and an unfilled shape on plain linen is one of the easiest ways to borrow it.
The lesson: try any unfamiliar technique on a home item before you commit it to clothing. If it fails, you have lost an afternoon and a metre of scrap.
What The Whole Project Actually Showed
| Phase | Style Direction | Difficulty | Rough Time Per Piece |
|---|---|---|---|
| Collar line work | Minimalist | Beginner | 2–3 hours |
| Padded monogram | Bold / streetwear | Intermediate | 4–5 hours |
| Denim mending | Sustainable / repair-led | Beginner | 3–4 hours |
| Chain-stitch border | Heritage / tonal | Intermediate | 6–8 hours |
| Stitch over print | Mixed media | Beginner | 2 hours |
| Home textiles | Decorative | Beginner | 1–3 hours |
Ten pieces, nine months, one palette. Two were unpicked entirely and started again, which is a normal ratio and not a sign of anything.
The interesting result is which pieces get used. Not the wool jacket border, which took the longest and looks the most accomplished. The mended jeans and the collar stem — both under four hours, both nearly invisible from three metres away, both worn constantly. Effort and affection turn out to be only loosely related.
Key Takeaways
- Work in this order: garment, palette, technique, motif. Reversing it is why projects stall.
- Nine colours maximum. A restricted palette makes unrelated pieces look like a collection.
- Height beats colour count. Padding, felt underlay and appliqué add more than extra thread ever will.
- Repair is the lowest-risk way into modern hand embroidery patterns, and one stitch is enough to begin.
- Borrow the structure of traditional motifs, not their palettes.
- Test anything unfamiliar on a cushion or napkin before it touches a garment.
- The current direction is quieter and more tactile than recent years: texture, tone-on-tone, negative space and mending, rather than large loud graphics.
Where To Take This Next
- This week: choose one garment you already own and would still wear if it looked slightly different. That is your first piece — no shopping required.
- Build the palette before the pattern. Nine colours, pulled from what you already wear rather than what looks pretty in a shop.
- Begin with a mend, not a masterpiece. A worn knee or a thin pocket costs nothing to get wrong and teaches tension faster than any sampler.
- Add one new technique per project. Padding, or appliqué, or metallic. Not all three at once, or you will not know which one worked.
- Photograph every finished piece against the same plain background. Six pieces in, you will start to see your own style, which is more useful than any trend list including this one.
- Keep a scrap of every fabric you stitch on, with the thread colours pinned to it. It becomes the reference you actually use.
Trends are permission to try something. What you keep wearing is the only verdict that counts, and nine months of finished pieces will tell you that faster than another year of saved images.
FAQ
Is hand embroidery still popular?
Yes, and the audience for it has widened rather than narrowed. Two separate currents feed it: people repairing and personalising what they own, and people looking for slow, screen-free work with something physical at the end. Both have pushed the same aesthetic — smaller, more textured, more personal — which is why current designs look so different from the large decorative panels of a decade ago.
What is the easiest embroidery for a complete beginner?
Running stitch on a firm woven fabric, ideally as a repair on denim or canvas. There is one stitch to learn, the fabric hides unevenness, and you finish with something usable rather than a practice square. Back stitch, satin stitch and a simple looped flower stitch are natural next steps and cover most beginner embroidery ideas.
How long does a small project take?
A cuff motif or compact monogram usually takes one to three hours. A padded or densely filled design on heavier fabric runs to four or six. Filling consumes the time, not complexity — an outline version of an intricate motif is often several hours faster and frequently looks better.
Can raised puff effects be done by hand?
Not identically, since genuine puff relies on a machine stitching over foam. The hand equivalent is padded satin stitch worked over stacked layers of felt or cotton. It is slower and the edges are softer, but on lettering or a monogram the result is close, and the slight irregularity tends to read as an advantage.
Which thread colours work best on clothing?
Tonal ranges, with one accent. Thread a shade or two away from the fabric gives pattern that shifts with the light and suits daily wear, while a single brighter or metallic colour supplies contrast where you want the eye to land. A neutral base, two or three muted mid-tones and one warm earth colour will cover most projects.
Does embroidery damage clothes?
Not when it is stabilised properly. Back stretch fabrics with a lightweight interfacing, keep stitching away from seams and high-stress points, and hold tension loose enough that the fabric lies flat when it leaves the hoop. Puckering is almost always a stabilising problem rather than a stitching one, and well-supported embroidery generally outlasts the garment.
1 thought on “Modern Embroidery Ideas 2026: Fresh Designs for Every Style”